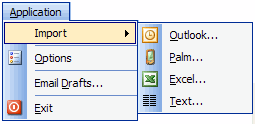
Importing your contacts from MS Outlook is accessed via the Application menu.
Application » Import » MS Outlook...
Your initial greeting screen will be shown below.
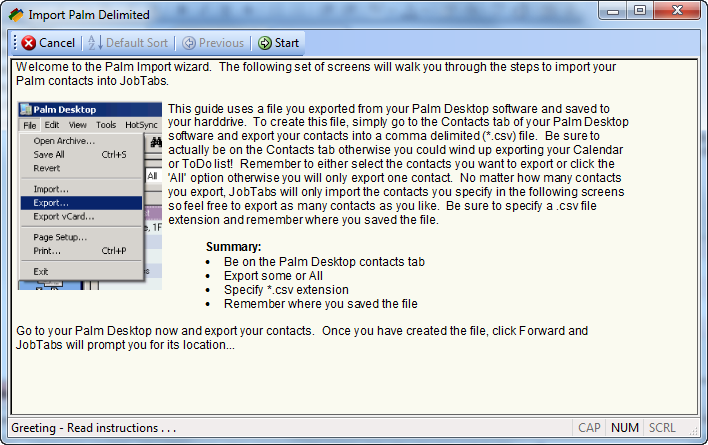
To start the import, simply click Start and your contacts will be read from MS Outlook into the wizard immediately. Your contacts will not actually be imported into JobTabs until you've identified which contacts you want to import. The contact currently being read will be shown on the status bar.
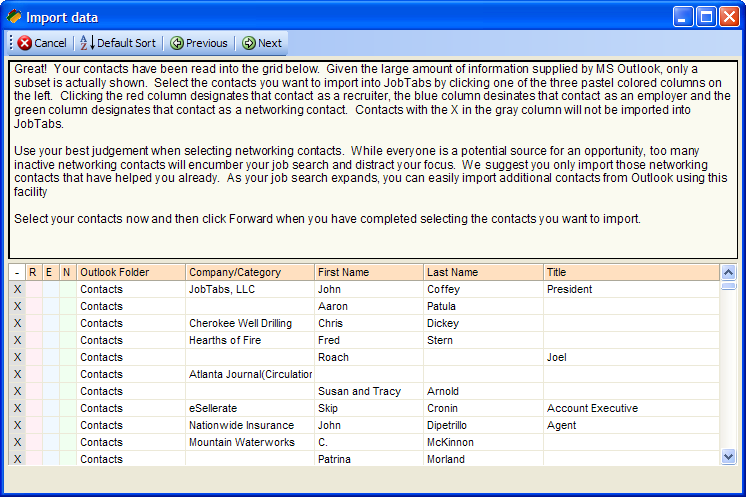
By default, your contacts are ordered in the exact same order they were read from MS Outlook. To sort your contacts by any of the other columns you simply need to click the orange colored header at the top of the column. The first click on a column will sort that column from A-Z. A second click in the same column will sort that column from Z-A. Find a layout that works best for you by experimenting. You can always return to the original sort order of the import by clicking the "Default Sort" on the toolbar.
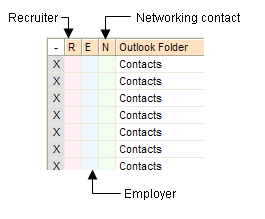
The JobTabs import wizard is an example of simplicity at its finest. To identify a contact as either a Recruiter, Employer or Networking contact you simply need to click the colored column that pertains to how you want to assign them. If the person you are importing is a recruiter, put an X next to their name in the red Recruiter column. You can designate your contact as an Employer by clicking the square next to their name in the blue center column. Networking contacts will receive an X in the green column to the right of the employer column. Select the gray column, the default, to not import the contact at all. If you decide not to import particular contact you can either click the gray column or toggle the column with the X.
When selecting contacts you want to import you can create recruiting firms, employers and networking categories on the fly. For example, if you have a friend Robert Johnson who does not have a designated employer you can simply type in his current employer under the Company/Category column in the grid.
 |
It is imperative that the contact be designated as either a Recruiter, Employer or Networking contact prior to assigning their company name or category. JobTabs will load the recruiting firm names, employer names and networking categories in an effort to minimize typing for you. |
After a contact has been assigned to a column, then you can type the name of their company or category in the Company/Category column. This will eliminate duplicate companies and categories. As a testament to which the development team has gone to make JobTabs as easy as possible,
-
If you select a contact for a company that you already have in JobTabs, JobTabs will not create that company again. Instead, it will add that person to the company for you.
-
If the contact and the company are already in JobTabs, JobTabs will compare the particulars (phone, email, mobile, etc.) for that person and only add those particulars which you do not already have.

To initiate the actual import, click the Next button on the toolbar. JobTabs will conduct an audit on your contacts to make sure they can be imported properly. If not, JobTabs will alert you to the discrepancy with a message along the lines of,
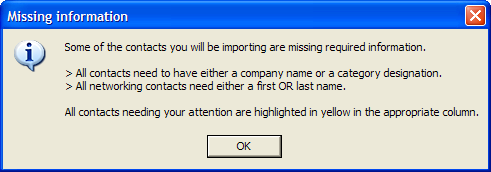
As a minimum, every contact needs to have a company or category associated with them. It can be part of the information that is being imported, it can be provided from data already in JobTabs or you can simply create a company or category on the spot.

Worth noting, as shown for Wachovia in the graphic, companies do not need to have a designated contact. If a contact is specified, that person needs to be associated with a company/category or JobTabs will not know where to place them.
The import is complete upon receiving the dialog shown below.
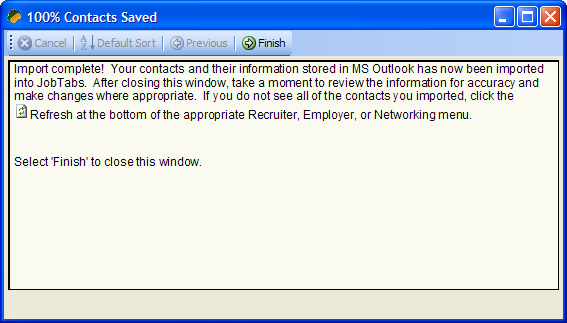
While JobTabs makes every effort to refresh the trees pertaining to each entity this can't always be done. Sometimes edit operations in progress or some anomaly will prevent the treeview from being refreshed. If any of your contacts do not who on their respective tabs, simply refresh the tree view by clicking 'Refresh' at the bottom of the menu for the respective entity.
 |
If any part of this help file was not clear we invite you to click the "Submit feedback" in the top right hand corner of this topic. We will be happy to expand upon or clarify anything. Thank you. |
© 2005 - 2012 by JobTabs, LLC. All rights reserved.